SecureVideo Clinical Chat is an encrypted, in-browser chat that SecureVideo account holders can use to communicate with their session participants, and/or with other account holders in the organization. Chat messages and files transferred through chat are encrypted in transit and at rest.
If you would like to disable (or re-enable) SecureVideo Clinical Chat on your account, please contact the Support team at [email protected] from the email address associated with your organization's Account Administrator.
Clinical Chat messages (or files sent through chat) are retained for 24 hours before they are automatically and permanently deleted. For file transfers, each user can upload up to 200MB at a time, and up to 1GB per day.
This support article illustrates how hosts can navigate the chat screen.
You may also be interested in:
Participant names/notification methods
1. Participant names are listed at the top of the chat. Each one will have an icon indicating their notification type:
- Phone: SMS notification
- Envelope: email notification
- Red quote bubble: no notification; the host (you) will have to provide them with their access code.

Add/Edit/Remove/View Participants
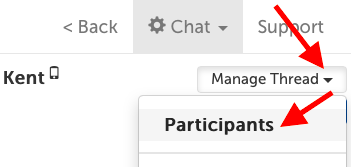
1. Click on the "Manage Thread" button in the upper right hand corner of the chat screen, and select "Participants".
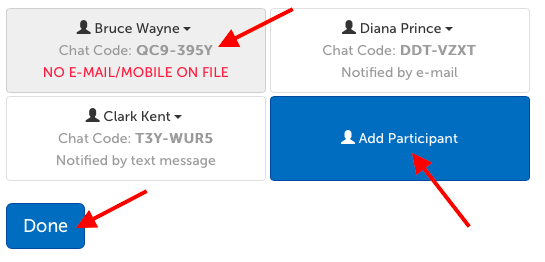
2. This screen shows all participants in the current group chat.
- Each participant has a unique chat code under their name that they can use to join the chat session instead of using an invite.
- Each participant's notification method is listed underneath their name.
- "Add Participant" button allows you to add another participant to the same chat thread. The new participant will be able to view all messages in the thread.
- Use the "Done" button to save any changes.
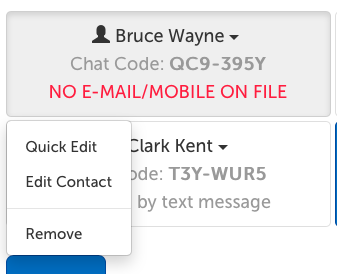
3. To edit an existing participant in the chat session, click on their name to access a drop down menu.
- Quick Edit: Edit the contact information for a participant.
- Only available for Contacts, and not for participants which have an account (labled "Login Required").
- Edit Contact: Navigate to the Edit Contact page.
- Remove: Remove participant from this chat group. The removed participant will lose access to previous and future messages unless added back.
Clear chat thread
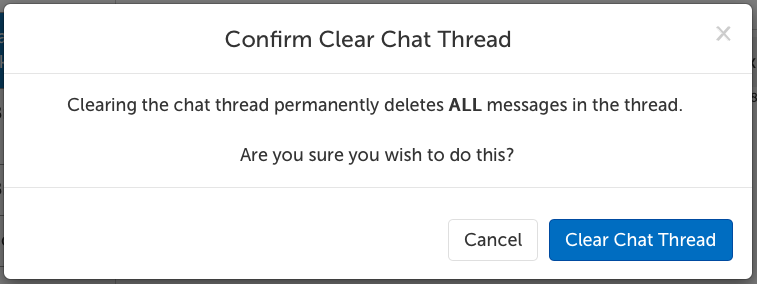
To clear a chat thread means to permanently delete ALL messages currently in the thread. Participants will still be able to post new messags.
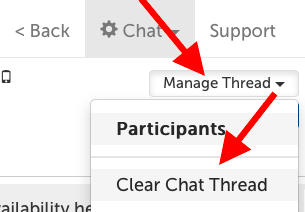
1. Click on the "Manage Thread" button in the upper right hand corner of the chat screen, and select "Clear Chat Thread".
2. A confirmation message will appear warning that this action will permanently delete all messages in the thread. Click the "Clear Chat Thread" button to confirm you would like to do this.
Clear chat thread and delete chat group
To clear a chat thread means to permanently delete ALL messages currently in the thread, and to delete a chat group means that participants that were in the group will no longer see this chat group in their chat panel on the left hand side of the chat screen.
- If your participants do not have a host role, and/or do not have permission to initiate contact with one another, this can also mean that they will lose the ability to ability with one another through the SecureVideo Clinical Chat feature.
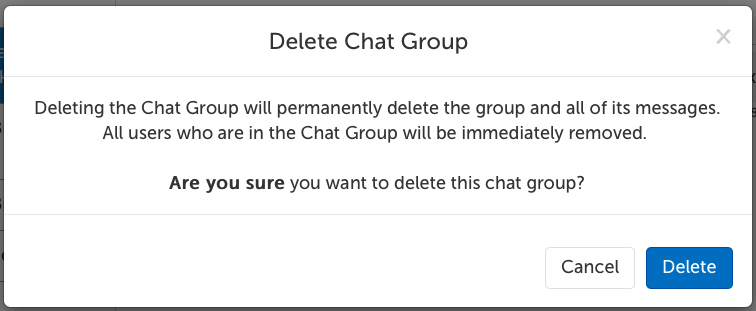
1. Click on the "Manage Thread" button in the upper right hand corner of the chat screen, and select "Delete Chat Group".
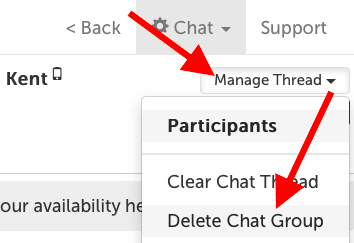
2. A confirmation message will appear warning that this action will permanently delete all messages in the thread, and that all users who are in the chat group will be immediately removed. Click the "Delete" button to confirm you would like to do this.
Close (hide) chat thread
To close a chat thread means to hide it in your chat panel on the left hand side. This does not affect any other user or delete any messages. To view the messages again (as long as the messages have been retained under your organization's retention settings), create a chat group with the same participants.
1a. Click on the "Manage Thread" button in the upper right hand corner of the chat screen, and select "Close Chat Thread".
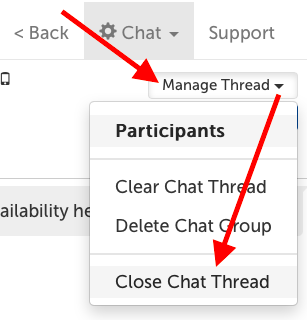
1b. Or, click on the "x" for that chat group in your chat panel on the left hand side.

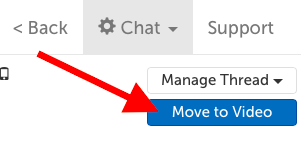
Move to video
This button automatically creates a videoconference session with this chat group's participants. A join link will appear within the chat for each participant to use.
- Chat participants will receive a chat message notification if they are away from the chat (according to their own notification preferences), but a separate videoconference session invitation will NOT be sent to avoid redundancy.
1. Click on the "Manage Thread" button in the upper right hand corner of the chat screen, and select "Cose Chat Thread".
2. An automated system message will appear:
![[Automated Message]: I have created a video session for us to continue the conversation face-to-face. Please click here [link] and then follow the prompts to "Enter Waiting Room". To later return to this chat, you can click on the 'Chat' link at the top of the screen. See you on the video!](../../Resource/Permanent/Screencap/00/0000/000000/00000003/Screencap-303-014_10BF8EC1350DE63CB4E3745F6909DEDBD7865EF943999497B9F28864424FA09B.png)
3. Your participants can click on the link to navigate to the videoconference waiting room page. You can click on the link to be redirected to your dashboard, where you can start the session:
Notification settings
1.Click on the "Chat" tab and then click on the "Notifications" option.
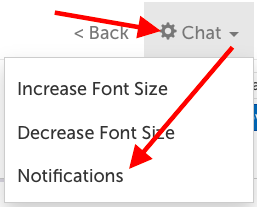
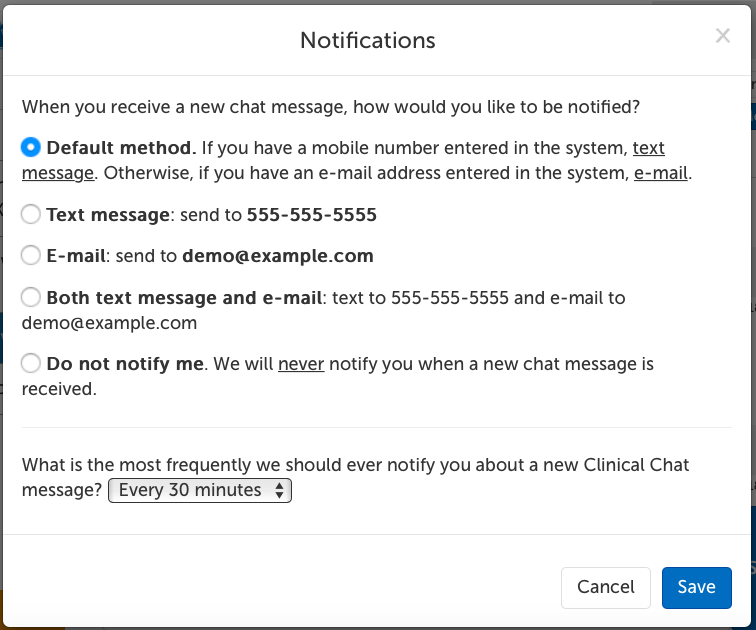
2. Settings for your notifications will appear.
- Note: users can only change their contact information if they have an account. If the user is one of your contacts, you will need to edit their contact information to add or edit any contact information for them.
The notifications settings have two categories:
- Delivery methods
- Default method: This setting is dynamic; you will receive notifications text message if you have a mobile number entered in the system. If you do not have a mobile number entered in the system, you will receive notifications by email.
- Text message: If you have a mobile number in the system, you can select this option to receive notifications by text message.
- E-mail: Select this option to receive notifications by email.
- Both text message and e-mail: If you have a mobile number in the system, you can select this option to receive notifications by both text message and email.
- Do not notify me: Deactivate notifications. You will still an unread indicator when you log into your account.
- Frequency
- Choose how frequently you would like to receive notifications (when offline) about a new chat message. (e.g., If your frequency is set to 30 minutes, then if someone sends you 5 new messages over the course of 29 minutes, you will only receive one notification during that 'waiting' period. If you open the chat app and close it again, you reset the wait period.) SMS/Email notifications are not sent if you have a chat screen page open.
New chat
Use the "New Chat" button on the left hand side to start a new chat.
How to send an attachment
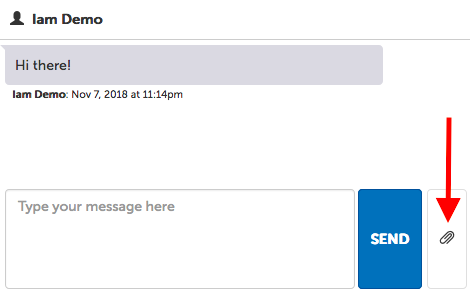
1. While on the chat thread you would like to upload a file to, click on the paperclip icon in the lower right hand corner.
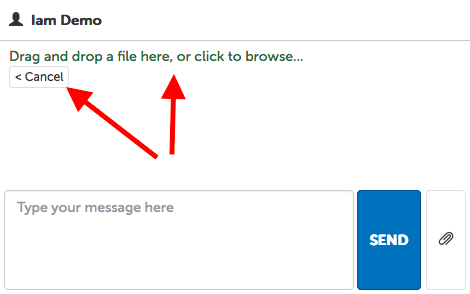
2. Drag and drop the file you wish to send on the blank space that appears, or click on the sentence in the box to select a file to upload.
- Use the "Cancel" button if you don't want to attach a file after all.
How to delete a message
1. Click on the trash can icon underneath the message you would like to delete (to the right of the date/timestamp).
- If you have a Host role, you can delete any message in a thread. Otherwise, you can only delete your own messages.

This article was last reviewed by our Support team on November 8, 2018.